Easy Gluten Free Red Velvet Cake Recipe
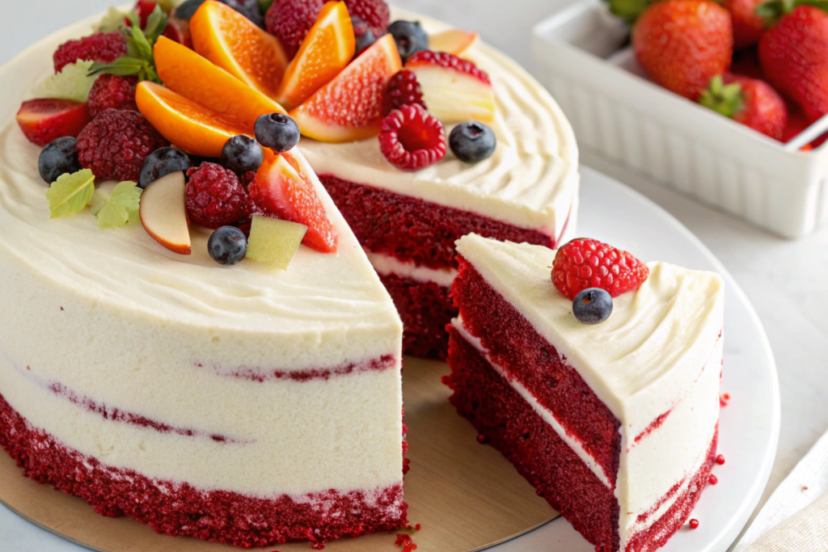
Red velvet cake is one of those iconic desserts that instantly screams elegance. But when you’re aiming for a gluten-free red velvet cake, the challenge of achieving that same velvety crumb without traditional flour can feel intimidating. Fear not! With the right techniques, ingredients, and a little love, you can whip up a cake that’s so tender and flavorful, no one will miss the gluten.
________________________________________
Why Gluten-Free Baking Isn’t Scary
Switching to gluten-free flour might feel overwhelming, but trust me, it’s easier than it looks. Using high-quality free flour blends, like Bob’s Red Mill, makes all the difference. They balance the structure that gluten usually provides with starches and gums like xanthan gum, ensuring a moist crumb and perfect texture.
________________________________________
Ingredients for Success: The Key to a Perfect Cake
Here’s what you’ll need to create this easy red velvet cake recipe:
Dry Ingredients
- 2 ½ cups gluten-free flour (a mix with brown rice flour and potato starch works best)
- 1 tsp baking powder
- ½ tsp baking soda
- 1 tsp xanthan gum
- ¼ cup cocoa powder
- ½ tsp salt
Wet Ingredients
- 1 cup vegetable oil
- 1 ½ cups granulated sugar
- 2 large egg whites (or flax eggs for a dairy-free option)
- 1 cup sour cream (use coconut oil and lemon juice for a vegan twist)
- 2 tsp vanilla extract
- 1 tbsp red food coloring (or beet powder for natural coloring)
- 1 tsp white vinegar
- ½ cup hot water
________________________________________
The Classic Cream Cheese Frosting
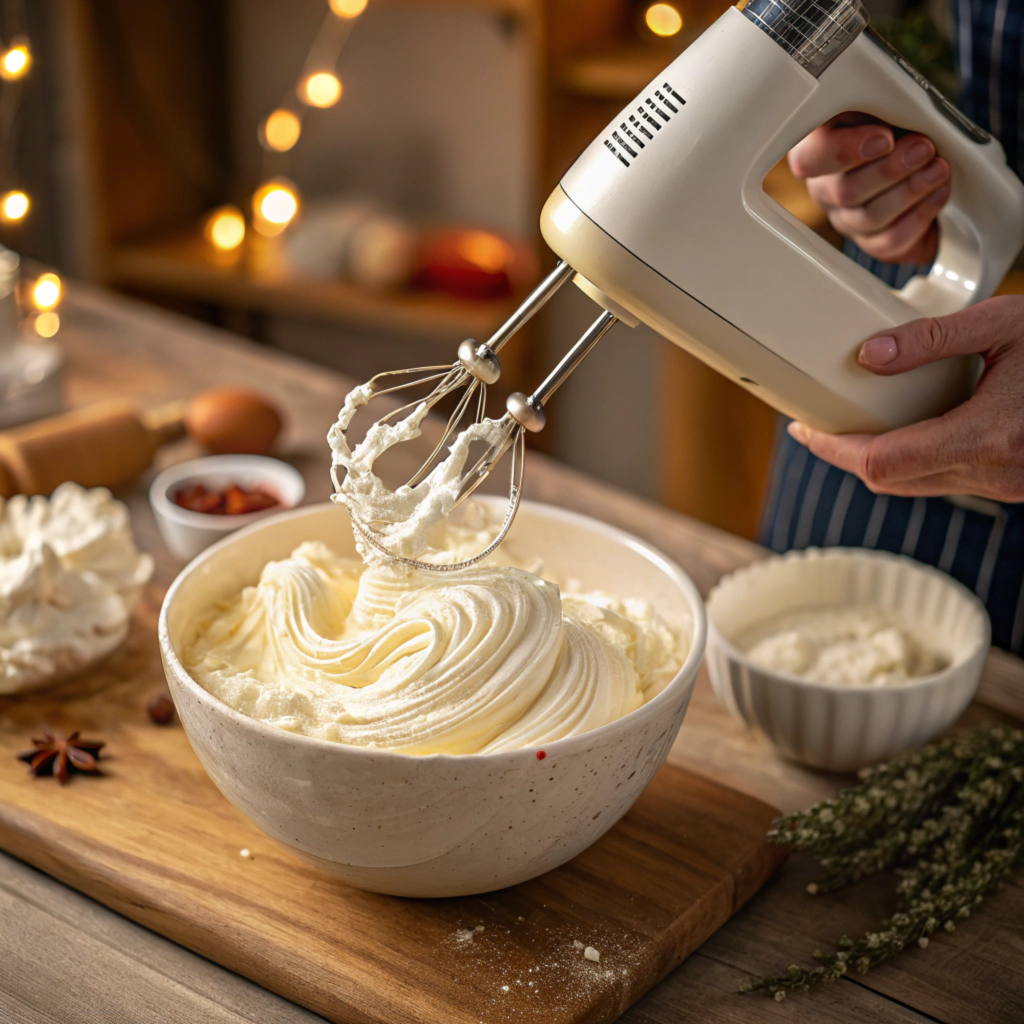
A gluten-free red velvet cake isn’t complete without its signature classic cream cheese frosting!
Ingredients
- 1 cup room temperature butter
- 8 oz vegan cream cheese (or regular cream cheese)
- 4 cups powdered sugar
- 1 tsp vanilla extract
________________________________________
Equipment You’ll Need
- Large mixing bowl and medium bowl
- Measuring cup and spoons
- Stand mixer or hand mixer
- Two 9-inch cake pans or prepared pans
- Parchment paper
- Wire rack
- Plastic wrap
- Cake boards
- Palette knife
________________________________________
Step-by-Step Instructions
Step 1: Prepare the Cake Pans
Grease your cake pans and line the bottoms with parchment paper. This is the best way to ensure the cake layers don’t stick.
Step 2: Mix the Dry Ingredients
In a large bowl, whisk together the gluten-free flour, cocoa powder, baking powder, baking soda, xanthan gum, and salt. These are your dry ingredients.
Step 3: Blend the Wet Ingredients
Using a stand mixer on medium speed, beat the vegetable oil and sugar until creamy. Add the egg whites (or flax eggs), one at a time, ensuring they’re fully incorporated. Then mix in the vanilla extract, red food coloring, and white vinegar.
Step 4: Combine Dry and Wet Ingredients
Gradually add the dry ingredients to the wet ingredients, alternating with the hot water and sour cream. This creates a smooth cake batter that ensures a tender crumb. Be sure to scrape the bottom of the bowl to mix evenly.
Step 5: Bake the Layers
Divide the cake mixture evenly between the prepared pans. Bake in a preheated oven at 350°F (adjust the oven temperature if needed) for 30-35 minutes or until a toothpick inserted into the center of the cake comes out clean.
Step 6: Cool Completely
Allow the cakes to cool in their pans for 10 minutes. Transfer them to a wire rack and cool completely before frosting. Wrap in plastic wrap and chill if assembling later.
________________________________________
Assembling the Cake
Step 7: Frost the Cake
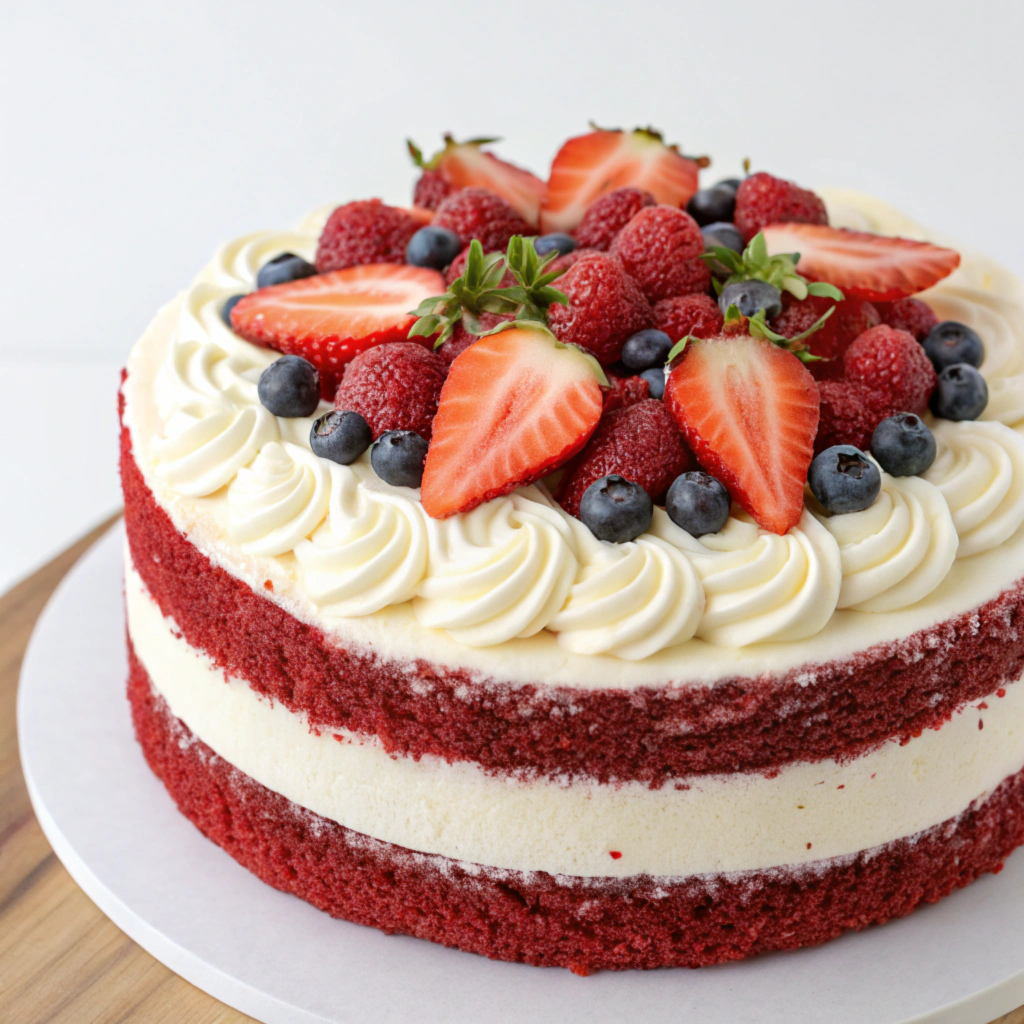
Place one cake layer on a serving plate or cake board. Spread a thin crumb coat using the classic cream cheese frosting. Stack the second layer on top and frost the entire cake with a thicker layer of frosting. Use a palette knife for a smooth finish.
Step 8: Decorate and Serve
Pipe extra frosting using a piping bag, sprinkle cake crumbs on top, or use natural decorations like berries or edible flowers for a special occasion.
________________________________________
Tips for Success
1. Use Room Temperature Ingredients
This ensures a smooth cake batter and an even bake. Trust me, it makes a huge difference.
2. Natural Coloring Options
Want to skip the red food coloring? Opt for beet powder or beet juice to achieve that vibrant red color.
3. Storing Your Cake
Keep the cake in an airtight container for up to 3 days. For longer storage, freeze slices wrapped in plastic wrap.
________________________________________
Vegan Red Velvet Cake Option
To make this cake fully vegan, swap the sour cream for coconut oil and lemon juice, and the egg whites for flax eggs. Use vegan cream cheese in the frosting.
________________________________________
Nutritional Information
| Serving Size | Calories | Carbs | Protein | Fat |
| 1 slice (1/12 of cake) | 350 | 42g | 4g | 18g |
________________________________________
Why You’ll Love This Cake
This homemade gluten-free cake is ideal for special occasions, birthdays, or even just a weekend treat. It’s light, fluffy, and has that slight tang that makes red velvet cupcakes so memorable.
________________________________________
Discover Related Recipes
- Red Velvet Cookies With Cake Mix (Quick & Easy)
- The Best Red Velvet Cake Ice Cream Recipe (No Churn)
- Easy Mini Oreo Cheesecake Recipe | Vegan Option
- Easy Mini Strawberry Cheesecake Recipe | Vegan Option
- The Best Chewy Double Chocolate Fudge Cookies Recipe
- Easy Jingle Juice Recipe – Christmas & Holiday Punch
- Eggnog Cocktail Recipes | Best Holiday Cocktails
- Christmas Starbucks Drinks | 10 Copycat Holiday Drinks
- Keto Vegan Chocolate Chip Cookies | Sugar & Gluten Free
- How to Make Waffles Without Milk (Dairy-Free Recipes)
- Best Dairy-Free Vanilla Cupcakes (Gluten-Free Option)
- Easy Vegan Eclair Recipe (With Gluten-Free Option)
- Easy Dairy-Free Crepe Recipe (Gluten-Free Option)
- Best Keto French Macarons Recipe | Vegan & Sugar-Free
- Gluten-Free Pumpkin Muffins Recipe (Vegan Option)
- Best Pumpkin Banana Muffins Recipe (Vegan Option)
- Plant-Based Recipe Cookbook
________________________________________
FAQs
1. Can I make this as cupcakes instead of a layer cake?
Absolutely! Use cupcake liners and bake at the same oven temperature for 18-20 minutes.
2. How do I prevent the cake from being dry?
Ensure you measure accurately with a measuring cup and don’t overmix your batter. Keeping the layers moist is key to the velvety crumb.
3. Can I use all-purpose flour instead of gluten-free flour?
This recipe is tailored for gluten-free cakes. If using regular purpose flour, you’ll need to omit the xanthan gum.
4. What’s the best way to store leftover frosting?
Keep it in an airtight container in the fridge for up to a week. Rewhip before using for a smooth texture.
5. Can I make this cake ahead of time?
Yes! Wrap unfrosted layers in plastic wrap and refrigerate for up to 2 days. Assemble and frost when ready to serve.
________________________________________
With this gluten-free red velvet cake recipe, you’ll impress everyone at your next special occasion. Whether it’s a valentine’s day surprise or a gluten-free birthday cake, this dessert will become your go-to for all things celebration-worthy.
________________________________________
Printable Recipe Card
Easy Gluten Free Red Velvet Cake Recipe
Equipment
- Large mixing bowl and medium bowl
- Measuring cup and spoons
- Stand mixer or hand mixer
- Two 9-inch cake pans or prepared pans
- Parchment paper
- Wire rack
- Plastic wrap
- Cake boards
- Palette knife
Ingredients
Dry Ingredients
- 2 ½ cups gluten-free flour a mix with brown rice flour and potato starch works best
- 1 tsp baking powder
- ½ tsp baking soda
- 1 tsp xanthan gum
- ¼ cup cocoa powder
- ½ tsp salt
Wet Ingredients
- 1 cup vegetable oil
- 1 ½ cups granulated sugar
- 2 large egg whites or flax eggs for a dairy-free option
- 1 cup sour cream use coconut oil and lemon juice for a vegan twist
- 2 tsp vanilla extract
- 1 tbsp red food coloring or beet powder for natural coloring
- 1 tsp white vinegar
- ½ cup hot water
- ________________________________________
The Classic Cream Cheese Frosting
- A gluten-free red velvet cake isn’t complete without its signature classic cream cheese frosting!
Ingredients
- 1 cup room temperature butter
- 8 oz vegan cream cheese or regular cream cheese
- 4 cups powdered sugar
- 1 tsp vanilla extract
Instructions
Step 1: Prepare the Cake Pans
- Grease your cake pans and line the bottoms with parchment paper. This is the best way to ensure the cake layers don’t stick.
Step 2: Mix the Dry Ingredients
- In a large bowl, whisk together the gluten-free flour, cocoa powder, baking powder, baking soda, xanthan gum, and salt. These are your dry ingredients.
Step 3: Blend the Wet Ingredients
- Using a stand mixer on medium speed, beat the vegetable oil and sugar until creamy. Add the egg whites (or flax eggs), one at a time, ensuring they’re fully incorporated. Then mix in the vanilla extract, red food coloring, and white vinegar.
Step 4: Combine Dry and Wet Ingredients
- Gradually add the dry ingredients to the wet ingredients, alternating with the hot water and sour cream. This creates a smooth cake batter that ensures a tender crumb. Be sure to scrape the bottom of the bowl to mix evenly.
Step 5: Bake the Layers
- Divide the cake mixture evenly between the prepared pans. Bake in a preheated oven at 350°F (adjust the oven temperature if needed) for 30-35 minutes or until a toothpick inserted into the center of the cake comes out clean.
Step 6: Cool Completely
- Allow the cakes to cool in their pans for 10 minutes. Transfer them to a wire rack and cool completely before frosting. Wrap in plastic wrap and chill if assembling later.
Assembling the Cake
Step 7: Frost the Cake
- Place one cake layer on a serving plate or cake board. Spread a thin crumb coat using the classic cream cheese frosting. Stack the second layer on top and frost the entire cake with a thicker layer of frosting. Use a palette knife for a smooth finish.
Step 8: Decorate and Serve
- Pipe extra frosting using a piping bag, sprinkle cake crumbs on top, or use natural decorations like berries or edible flowers for a special occasion.
Notes
- Use Room Temperature Ingredients
This ensures a smooth cake batter and an even bake. Trust me, it makes a huge difference. - Natural Coloring Options
Want to skip the red food coloring? Opt for beet powder or beet juice to achieve that vibrant red color. - Storing Your Cake
Keep the cake in an airtight container for up to 3 days. For longer storage, freeze slices wrapped in plastic wrap.

